Supplied:
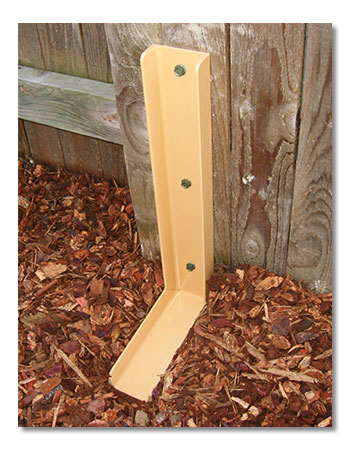
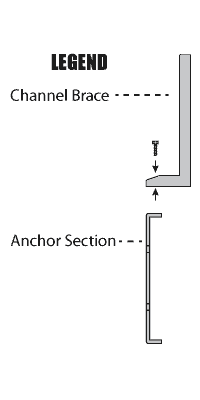
The Fix-A-Fence channel brace
The Fix-A-Fence anchor section
3 qty. 5/16 x 3 inch lag screws
3 qty. #14 x 1 inch Tek screws
1 qty. 5/8 x 1 inch bolt
Tools Needed:
Ratchet or drill
7/16 inch socket (wood)
3/8 inch nut driver (metal)
15/16” socket or adjustable wrench
Post hole digger or shovel
Wheelbarrow or 5 Gallon bucket
Level
Measuring tape
|
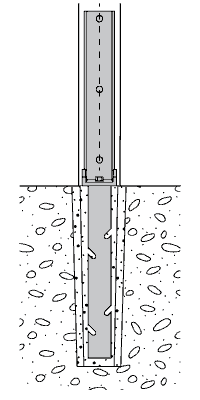
Remove red plug from anchor section (keep for future use if Channel Brace is ever removed). Bolt anchor section to channel brace using supplied 5/8” bolt and tighten firmly
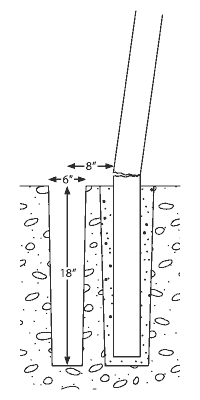
Measure 8 inches out from the bottom edge of the damaged post (this marks the center of the hole to be dug).
Using your mark, prepare a hole 18 inches deep and 6 inches in diameter. |
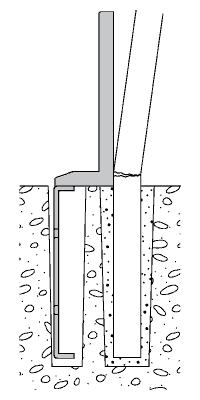
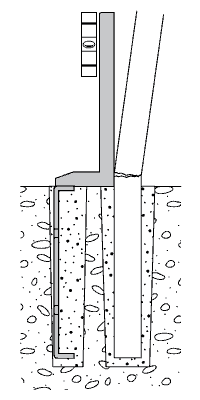
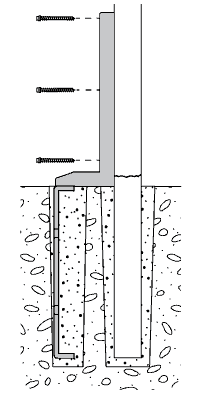
Place the assembled Fix-A-Fence in the hole, keeping the base against the bottom of the post.
Mix the 60 lb. bag of concrete according to the manufacturers instructions. |